When your desktop suddenly glitches, freezes, or refuses to power on, it's more than just an inconvenience—it's often a sign of underlying Power & Hardware Malfunctions. For many, the immediate reaction is panic, fearing lost data or an expensive repair bill. But here's the good news: many common hardware issues aren't death sentences for your PC. With a methodical approach and a little patience, you can often diagnose and even fix these problems yourself, saving time, money, and your digital peace of mind.
This isn't just about technical fixes; it's about understanding your machine better, demystifying those cryptic error messages, and empowering you to act with confidence. So, let's roll up our sleeves and dive into the world of desktop diagnostics.
At a Glance: Your Quick Troubleshooting Roadmap
- Identify the Symptoms: Pay close attention to sounds, smells, visual cues, and error messages. These are your first clues.
- Start Simple: Always check the most basic things first, like power cables and outlets, before diving into complex diagnostics.
- Systematic Checks: Work your way through power, memory, storage, and cooling components using built-in tools and visual inspections.
- Safety First: Disconnect power before opening your PC. Be mindful of static electricity.
- Backup Your Data: If you suspect a storage issue, prioritize data backup immediately.
- Know When to Call a Pro: Don't hesitate to seek expert help if you're uncomfortable or if issues persist after your attempts.
Decoding the Digital Dilemma: Common Hardware Failures
Before we tackle specific solutions, let's get a feel for the usual suspects behind a desktop's woes. Understanding the common types of Power & Hardware Malfunctions helps you narrow down possibilities when something goes awry.
Think of your desktop as a symphony orchestra; if one instrument is out of tune, the whole performance suffers. Here are the main sections that can go off-key:
- Power Supply Unit (PSU) Failure: This is the heart of your system. If it fails, your computer won't even wake up, or it might experience unexpected shutdowns and reboots.
- Hard Drive Issues: The library of your PC. Problems here can lead to data loss, slow system performance, system crashes, or your computer failing to boot into the operating system.
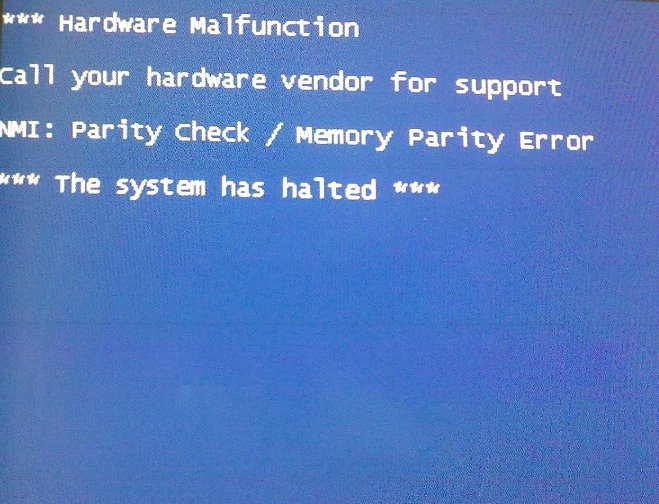
- Memory (RAM) Malfunctions: Your computer's short-term memory. Faulty RAM often manifests as random program freezing, frequent "Blue Screen of Death" (BSOD) errors, or your system simply failing to start up.
- Motherboard Problems: The nervous system connecting everything. A motherboard issue can have far-reaching effects, impacting multiple components and leading to no video, no POST (Power-On Self-Test), or cryptic beep codes.
- Graphics Card (GPU) Troubles: Responsible for everything you see on screen. GPU issues can cause flickering displays, distorted images, poor gaming performance, or no video output at all.
- Overheating & Cooling System Failure: When things get too hot, components degrade or shut down to protect themselves. This often causes random shutdowns, system instability, or performance throttling.
- Peripheral Problems: External devices like keyboards, mice, or external drives. These might stop working, behave erratically, or not be recognized by the system.
Each of these components plays a crucial role, and recognizing the specific symptoms can provide valuable clues for diagnosis.
When Silence isn't Golden: Diagnosing Power Supply Issues
Few things are as frustrating as pressing the power button and being met with absolute silence. This often points straight to your Power Supply Unit (PSU). But sometimes, the PSU shows subtler signs of distress.
Immediate Action: If You See Smoke!
This is non-negotiable: Immediately shut down and unplug your computer. If you see or smell smoke, there's an electrical component failing, potentially a fire hazard. Have a fire extinguisher rated for electrical equipment (Class C) handy. Do not attempt to power it on again until the issue is professionally resolved.
My Computer Won't Turn On – A Step-by-Step Checklist
If your computer is playing dead, let's walk through the basics:
- Check Power Connections: Ensure the power cable is firmly plugged into both the back of your computer and the wall outlet. Is the outlet itself working? Test it with another device.
- Verify Internal Connections: With the computer unplugged and the case open, make sure the main power cables from the PSU are securely connected to the motherboard and any other necessary components (like the GPU).
- Inspect the Power Cable: Sometimes the cable itself is faulty. Swap it with a known working cable. If you have a multimeter, you can check for continuity.
- Internal/External Power Switches: Many PSUs have a physical on/off switch on the back. Ensure it's in the 'on' position.
- Voltage Selector: Some PSUs have a small red switch on the back to select between 110V and 220V. Ensure this is set correctly for your region. An incorrect setting can prevent the computer from powering on or even damage the PSU.
- Test the PSU Separately: If you have a spare computer, carefully test the suspect PSU in that machine (if compatible). If it fails there, you've likely found your culprit.
Subtle PSU Warnings: Freezes, Shutdowns, and Overheating
The PSU isn't just about providing power; it's about providing stable, adequate power.
- Freezing Before OS Loads: If your computer gets stuck or freezes during the initial boot sequence, before the operating system even starts, it could indicate that the PSU isn't providing enough stable power. Check your computer's total wattage requirements, especially if you've added new components.
- Random Shutdowns: Your computer powering off unexpectedly, without warning, can often be a PSU issue. Sometimes, it's an intermittent fault. Check the PSU's fan—is it spinning freely? If the PSU fan isn't working, the unit can overheat and shut down to protect itself.
- Overheating: While we'll cover general overheating later, a failing PSU fan or an overworked PSU can contribute significantly to overall system heat. Ensure all fans, including the PSU's, are clear of obstructions and spinning.
When a PSU fails, replacement is generally the only viable option. Always ensure the new PSU has sufficient wattage for your components and is from a reputable brand. This is a critical component for your system's stability and longevity. To dive deeper into ensuring your system is built to last, you might want to read our essential PC maintenance guide.
Navigating the Nervous System: Motherboard and RAM Troubles
The motherboard is the backbone of your desktop, coordinating communication between all components. RAM is its short-term memory. When either falters, your system will scream for help—sometimes literally.
Motherboard Mayhem: No Beeps, No Video, No Life
The motherboard often communicates its distress through "beep codes" during startup. But what if you hear nothing, and your screen remains blank?
- Confirm Power to Monitor: Ensure your monitor is plugged in, turned on, and connected to the correct video output on your PC (integrated graphics or dedicated GPU).
- Strip Down to Basics: Unplug all external accessories except the monitor, keyboard, and mouse. Remove any unnecessary internal components like extra drives or expansion cards. This helps isolate the problem.
- Visual Inspection: With the computer unplugged and the case open, carefully examine the motherboard for any signs of physical damage. Look for swollen or burst capacitors (they look like small cylinders that are bulging or have fluid residue), scorch marks, or melted areas. If you spot anything like this, the motherboard is likely beyond repair and needs replacement.
- Internal Connections: Double-check that all power connectors (the large 20/24-pin connector and the smaller 4/8-pin CPU power connector) are firmly seated on the motherboard. Ensure any internal power switches are on.
- Reseat Components: Gently unclip and re-seat your RAM modules and your CPU (if you're comfortable doing so, after carefully inspecting it). Ensure they are properly installed.
- Check Jumpers: Some motherboards use jumpers to configure settings. Consult your motherboard manual to ensure any relevant jumpers are in the correct positions.
- Reset BIOS: If all else fails, a corrupt BIOS setting can prevent your PC from booting. To reset the BIOS to its default settings, power down, unplug the PC, and remove the small circular CMOS battery from the motherboard for about 30 minutes. Press and hold the power button for 15-30 seconds (while unplugged) to discharge any residual power. Then replace the battery and try to boot. For more on this, check out our guide on understanding BIOS settings.
Beep Codes: Your Motherboard's Cry for Help
If your computer powers on and you hear a series of beeps but no video, your motherboard is trying to tell you something specific. These "beep codes" are diagnostic signals.
- Count the Beeps: Pay close attention to the number of short and long beeps.
- Consult the Manual: Your motherboard's manual (or the manufacturer's website) will have a list of beep codes and their corresponding error meanings (e.g., 1 long, 2 short beeps might mean a video card error). This is a critical step in diagnosing the problem. Once you know the component, you can focus on reseating or replacing it.
RAM Woes: The Blue Screen Blight and Startup Stalls
Faulty RAM can cause frustratingly vague symptoms, from random crashes to outright boot failures.
- Symptoms: Frequent system freezing, programs crashing often, arbitrary reboots, or the dreaded "Blue Screen of Death" (BSOD) with memory-related error messages. If your system fails to start completely, RAM could be a major suspect.
- Startup Repair First: If your system fails to boot due to a RAM-related issue, try Windows' built-in Startup Repair first.
- Windows Memory Diagnostic: This is your go-to tool for RAM testing.
- If Windows is Running: Go to Control Panel > System and Security > Administrative tools, then double-click "Windows Memory Diagnostic." Alternatively, type
mdschedin the Start menu search bar or Command Prompt. You'll need to restart your computer to run the test. - If Windows Fails to Start: You can access Windows Memory Diagnostic via the Windows Boot Manager. As your system starts, repeatedly tap the spacebar (or look for a prompt to enter "Windows Boot Manager"), then use the Tab key to select Windows Memory Diagnostic. It's also often available within the System Recovery Options.
- Testing Levels: The diagnostic tool offers different testing levels: Basic, Standard (default, 2 passes), and Extended. While Extended takes much longer, it performs a more thorough check and is more likely to catch intermittent memory problems that standard tests might miss.
- Reseat and Replace: If the diagnostic identifies issues, try carefully unseating and then re-seating your RAM modules. Sometimes, a loose connection is all it takes. If the problem persists, you'll need to replace the faulty module(s). Ensure any new RAM is compatible with your motherboard and existing modules.
The Digital Librarian: Keeping Your Hard Drive Healthy
Your hard drive is where your operating system, programs, and precious data reside. When it starts acting up, it can be a slow, painful descent into data loss or a sudden system crash.
The Dreaded Bad Sectors
- What are They? A bad sector is a tiny area on your hard drive that has become permanently damaged and can no longer reliably store data. This can be due to physical damage (like a head crash) or logical errors that prevent the operating system from accessing it.
- Symptoms: System freezing, unusually slow file access, cryptic "stop errors," or specific error messages indicating disk problems.
- Your Tool:
chkdskWindows has a powerful utility calledchkdsk(Check Disk) designed to find and repair these issues. - Running
chkdsk(Graphical User Interface - GUI):
- Open File Explorer (Start > Computer/This PC).
- Right-click on the drive volume you want to check (e.g.,
C:). - Select "Properties," then navigate to the "Tools" tab.
- Under "Error-Checking," click "Check Now" (or "Check" in Windows 10/11).
- To attempt to repair bad sectors, select "Scan for and attempt recovery of bad sectors."
- If you're checking your system volume (usually
C:), Windows will ask to schedule the check for the next time you restart your computer. Agree to this and restart.
- Running
chkdsk(Command Line): This offers more control.
- Open Start, type
cmd, right-click "Command Prompt" and select "Run as Administrator." - Type
chkdskand press Enter to get a status report of the disk without making changes. - To see available parameters, type
chkdsk /?. - A common command to check and fix errors, including marking bad sectors, is
chkdsk c: /f /r /v(replacec:with the drive letter you want to check).
/f: Fixes errors on the disk./r: Locates bad sectors and recovers readable information (implies/f)./v: Displays the full path and name of every file on the disk (useful for verbose output).
- Again, if checking the system volume, you'll be prompted to schedule the check for the next restart. Type
Yand restart your computer.
Proactive Measures for Drive Health
- Backup, Backup, Backup: If you suspect your hard drive is failing, back up your critical data immediately. Hard drives often give little warning before total failure. Consider cloud storage or an external drive. If you've already lost data, exploring data recovery software options might be your next step.
- Defragment Regularly (for HDDs): Mechanical hard drives benefit from defragmentation, which reorganizes scattered data for faster access. SSDs (Solid State Drives) do not need defragmentation; it can actually reduce their lifespan.
- Consider an SSD Upgrade: SSDs offer significantly faster performance and greater durability due to having no moving parts. If your system still uses an HDD, upgrading to an SSD for your operating system can dramatically improve responsiveness and reduce the likelihood of mechanical failures.
Don't Melt Down: Tackling Overheating
Overheating is a silent killer, slowly degrading your components and leading to frustrating performance issues or sudden shutdowns. It's crucial to address it promptly.
Common Symptoms of Overheating
- Sudden Power Loss: Your computer shuts down without warning after running for a few minutes. This is a self-preservation mechanism.
- Performance Throttling: Your PC feels sluggish during demanding tasks, games stutter, or programs crash.
- Loud Fan Noise: Fans constantly spinning at high RPMs, indicating they're working overtime to dissipate heat.
- Hot to the Touch: The computer case or specific areas feel unusually hot.
How to Keep Your Cool: Actions to Take
- Check CPU Fan: The CPU (Central Processing Unit) is your computer's brain and generates significant heat. Ensure its fan is spinning freely and not obstructed.
- Optimize Airflow:
- Desktop Placement: Ensure your desktop tower has adequate space around it, especially at the rear and sides where fans exhaust hot air. Don't block vents.
- Clear Obstructions: Make sure no cables, books, or other items are blocking the intake or exhaust vents of your computer.
- Clean Out the Dust: Dust acts as an insulating blanket, trapping heat inside your computer.
- Power Down & Unplug: Always do this before opening the case.
- Compressed Air: Use a can of compressed air (holding it upright to prevent propellant discharge) to blast dust out of fans (CPU, GPU, case fans, PSU fan) and heatsinks. Hold fan blades gently to prevent over-spinning them with air, which can damage bearings.
- Wipe Surfaces: Use a microfiber cloth to wipe down interior surfaces.
- Monitor Temperatures:
- BIOS: Many BIOS settings offer a basic temperature reading for the CPU.
- Diagnostic Software: Use third-party software (e.g., HWMonitor, Speccy, Core Temp) to monitor CPU, GPU, and drive temperatures in real-time while Windows is running. A CPU consistently above 80-90°C under load, or a GPU above 90-95°C, indicates a serious overheating problem.
- Replace Thermal Paste: The thermal paste between your CPU and its heatsink can dry out over time, losing effectiveness. If your CPU fan is working but temperatures are high, carefully clean off the old paste (using isopropyl alcohol) and apply a fresh, thin layer of high-quality thermal paste. This can dramatically improve heat transfer.
- Upgrade Cooling: For high-performance systems or if you experience persistent overheating after basic cleaning, consider upgrading your CPU cooler (e.g., to a larger air cooler or an AIO liquid cooler) or adding more case fans for better airflow.
Beyond the Core: Graphics Cards and Peripherals
While the core components get a lot of attention, your graphics card and external peripherals can also be sources of frustration.
Graphics Card (GPU) Glitches
- Symptoms: Flickering screen, distorted images (artifacts), green/red lines, poor performance in games, or no video output at all.
- Reseat the GPU: Power down, unplug, open the case, and carefully remove your graphics card. Clean its contacts and the PCIe slot with compressed air, then firmly re-seat the card, ensuring the locking clip engages.
- Check Power Cables: Ensure any supplementary PCIe power cables (6-pin or 8-pin) are securely connected from the PSU to the GPU.
- Test Integrated Graphics: If your CPU has integrated graphics, remove your dedicated GPU and plug your monitor into the motherboard's video output. If the system now boots fine, your dedicated GPU is likely the problem.
- Driver Issues: Ensure your graphics drivers are up to date. Sometimes, rolling back to an older, stable driver version can resolve issues.
- Upgrade/Replace: If troubleshooting fails, consider an upgrade or replacement.
Perplexing Peripheral Problems
- Symptoms: Mouse/keyboard not responding, external hard drive not recognized, webcam not working.
- Check Connections: The simplest fix: ensure all cables are securely plugged in. Try a different USB port.
- Test on Another Computer: Plug the peripheral into a different computer. If it works there, the problem lies with your original PC (drivers, port, software).
- Update Drivers: Outdated or corrupted drivers are a common cause of peripheral issues. Check the manufacturer's website for the latest drivers.
- Replace: If the peripheral fails on another computer and driver updates don't help, the device itself is likely faulty and needs replacing.
Your Desktop's Doctor: Professional Help
Sometimes, despite your best efforts, the problem persists, or you simply don't feel comfortable delving into the intricate world of PC hardware. That's perfectly normal, and it's precisely when professional help becomes invaluable.
When to call in the cavalry:
- Lack of Comfort: If you're nervous about opening your computer case, handling components, or accidentally damaging something, a professional technician is your best bet.
- Persistent Issues: You've followed all the troubleshooting steps, tried various fixes, but the problem just won't go away.
- Complex Motherboard/CPU Issues: Diagnosing and replacing a motherboard can be complex and sometimes requires reinstalling the operating system. CPU replacement is also delicate.
- Specialized Tools: Professionals have access to advanced diagnostic tools and often spare parts for quick testing that you might not.
- Time is Money: If your time is valuable, a professional can often diagnose and fix issues much faster than you can.
Remember, a good technician can save you from further damage, wasted time, and the frustration of a persistent hardware malfunction.
Debunking the Digital Delusions: Common Hardware Myths
The world of computers is rife with misconceptions. Let's clear up a few common myths about Power & Hardware Malfunctions:
- "Viruses can physically damage my hardware."
- Myth: While malware can corrupt your software, delete data, and even make your system appear to malfunction by constantly running processes that stress components, it is extremely rare for a virus to cause direct, permanent physical damage to hardware components like your CPU, RAM, or hard drive. Their primary goal is data manipulation or system control.
- "Overclocking is always safe if done correctly."
- Myth: While it's true that responsible overclocking (with proper cooling and voltage adjustments) can extend a component's performance, it inherently increases heat and stress. Even "safe" overclocking can subtly shorten the lifespan of components compared to running them at stock speeds. It's a trade-off: more performance now, potentially less longevity later.
- "My computer needs to be defragmented every week."
- Myth: This largely applies to older mechanical Hard Disk Drives (HDDs). Modern operating systems often defragment HDDs automatically in the background. Furthermore, Solid State Drives (SSDs) should never be defragmented, as it's unnecessary and can reduce their lifespan.
Your Burning Questions Answered: FAQ
What are the most common signs of impending hardware failure?
Common signs include random system crashes, frequent "Blue Screen of Death" errors, unusually slow system performance, strange noises (clicking or grinding from a hard drive, loud fan noises), devices not being recognized, and the computer failing to start or consistently freezing.
Can a virus cause permanent hardware damage?
No, not directly. While malware can make your system unstable, cause components to overheat due to excessive workload, or corrupt firmware, it's highly unlikely to physically "fry" or permanently damage a hardware component itself. Viruses target software and data.
How long does computer hardware typically last?
The lifespan varies greatly depending on the component, usage, quality, and maintenance. Generally, you can expect components like CPUs, RAM, and motherboards to last 5-10 years. Hard drives (HDDs) typically last 3-5 years, while SSDs often last longer, 5-7 years or more. Graphics cards might last 3-7 years, often upgraded sooner for performance. Proper maintenance can significantly extend these lifespans.
Should I upgrade or repair a faulty component?
It depends on the component and its cost. RAM, storage drives (HDD/SSD), and even graphics cards are often straightforward and cost-effective to upgrade or replace. A new motherboard, however, can be a complex replacement, sometimes necessitating a full system rebuild or even a new operating system installation, making a full system upgrade more appealing. Consider the age of your system and the cost of the repair versus the cost of new hardware.
Is it safe to replace computer parts myself?
Yes, for many components like RAM modules, storage drives (SSDs/HDDs), and graphics cards, it's generally safe for a beginner to replace them. However, always take precautions: ensure the computer is unplugged, discharge static electricity (e.g., by touching a metal part of the case), and follow component-specific instructions. More complex tasks, such as replacing a motherboard or CPU, might require a bit more experience or the help of a professional. If you're dealing with an older system, you might find some troubleshooting parallels with other devices, like those for Firestick not working troubleshooting.
Can I choose a new power supply with higher wattage than my current one?
Yes, you can. It's often recommended to choose a PSU with wattage slightly higher than your system's estimated peak needs. This provides headroom for future upgrades and ensures the PSU isn't constantly running at its maximum capacity, which can extend its lifespan. For guidance on sizing your next power supply, explore our article on choosing the right power supply.
Empowering Your Desktop's Future
Armed with this knowledge, you're no longer at the mercy of sudden reboots or blank screens. Understanding the common causes of Power & Hardware Malfunctions and having a clear troubleshooting roadmap empowers you to approach these issues with confidence. From basic cable checks to delving into diagnostic tools like chkdsk and Windows Memory Diagnostic, you now have the tools to pinpoint and often resolve many problems yourself.
Remember, prevention is always better than cure. Regular cleaning, monitoring temperatures, and performing routine system checks can significantly extend the life of your desktop and keep those frustrating malfunctions at bay. And when in doubt, or if the problem proves too stubborn, don't hesitate to consult a professional. Your desktop is an investment, and keeping it healthy ensures your digital life continues to run smoothly.